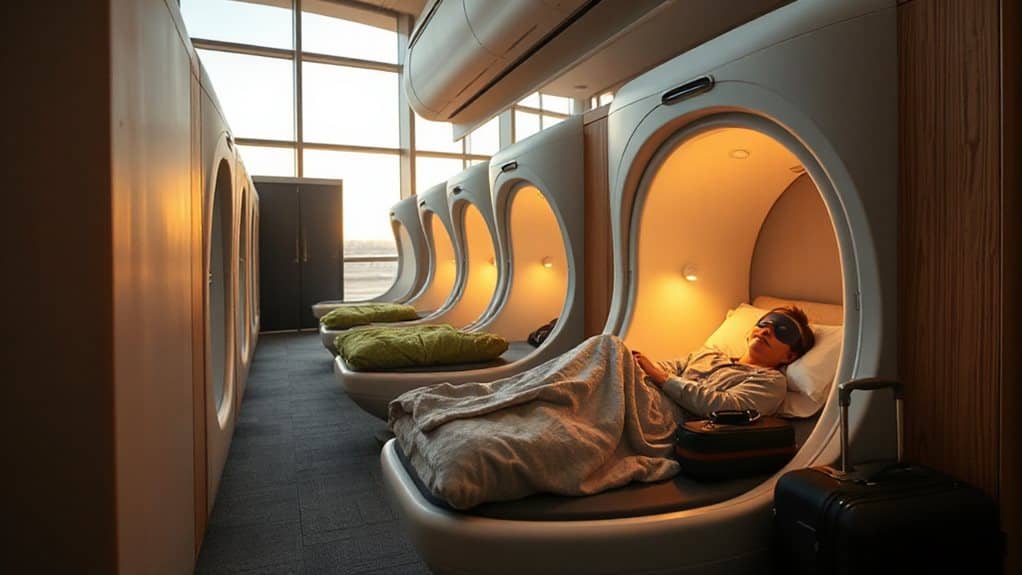
Locate the pod zone on the terminal map—look for “relax,” “nap,” or “sleep” signs—then use the airport app or a kiosk to check real‑time availability and book a slot. Bring a photo ID, passport, and a paper boarding pass, then check in at the pod’s touchscreen, confirming your reservation and payment. Plug your devices into the USB ports, connect to the built‑in Wi‑Fi, and adjust lighting, temperature, and white‑noise settings for comfort. Store valuables in the locker, set an alarm, and keep a quick‑access flight display nearby; the next sections will show you how to optimize your stay.
TLDR
- Arrive early, locate “relax” zones on terminal maps, and book a pod via the airport app or kiosk for guaranteed availability.
- Bring compact essentials: travel‑size toiletries, a neck pillow, eye mask, earplugs, and a power bank to stay comfortable and powered.
- Connect to the pod’s Wi‑Fi, plug devices into USB ports, and use the touchscreen to stream media or enable white‑noise for relaxation.
- Adjust climate, lighting, and bed angle through the pod’s control panel or dedicated app to personalize your sleep environment.
- Check out via the pod screen before the deadline, confirm digital receipt, and keep your reservation code for easy re‑entry if needed.
Why Airport Sleeping Pods Are Worth Your Time
Why should you consider airport sleeping pods? You’ll gain private, quiet space with reclining seats, secure storage, and charging ports, letting you rest during long layovers. Market data shows over 40% of travelers prefer these zones, and airports report up to 30% smoother passenger flow. Smart booking, climate control, and UV‑C sanitation enhance comfort and hygiene, while real-time monitoring improves efficiency and revenue. This practical solution frees you from cramped lounges. The market is projected to reach USD 102.7 billion by 2032, reflecting strong growth driven by increasing air passenger traffic. Many travelers also prioritize secure storage and situational awareness when choosing where to rest at night.
Choose the Right Type of Pod for Your Needs
After learning why airport sleeping pods save time and reduce stress, the next step is matching a pod to your specific travel needs. If you need a quick rest, choose a Standard Pod with a bed, Wi‑Fi, and lockers for about 120,000 VND. For privacy, pick a Private Pod with soundproofing and adjustable beds.
Luxury Pods add climate control, showers, and lounge access, while First‑Class Pods offer suites with bars and entertainment. Budget Pods give minimal amenities at low cost. Many travelers also consider seat width and legroom when deciding between pods and traditional seating options.
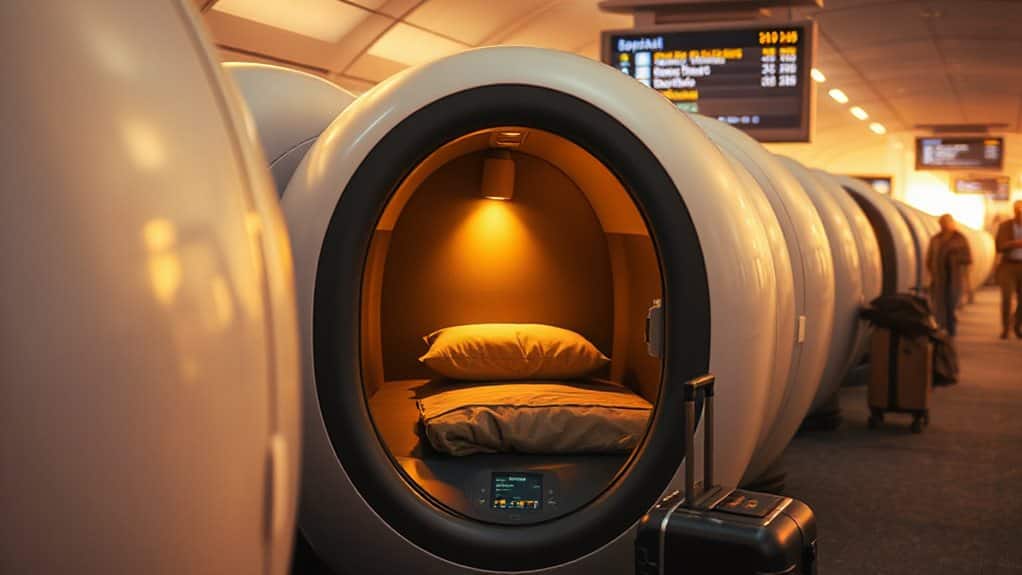
Find the Pod Location and Availability in Your Airport
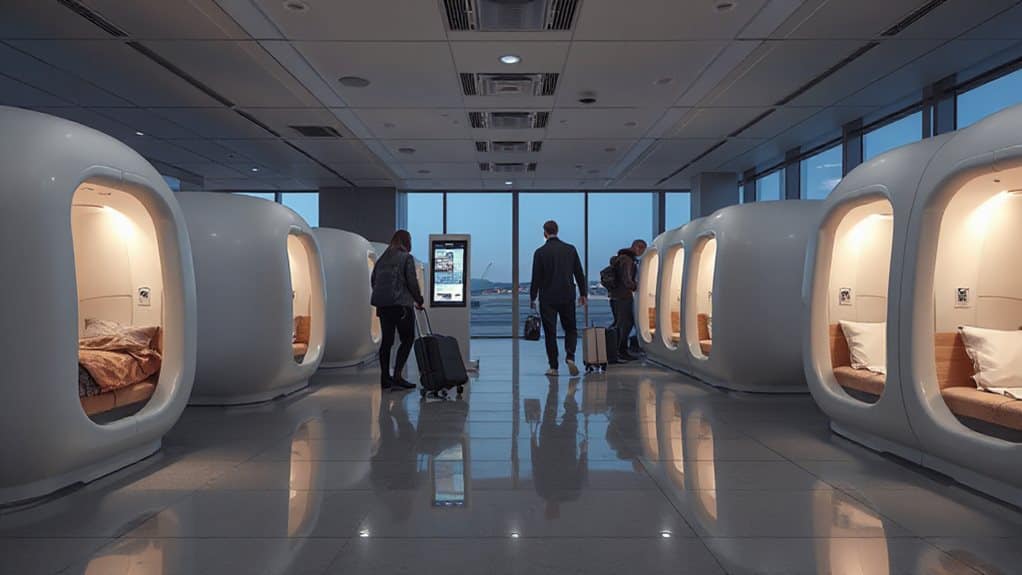
You can locate pods by checking the airport terminal map for zones labeled “relax,” “nap,” or “sleep,” and by using the official airport app or a third‑party site for real‑time availability. Many airports also place kiosks near security or gates where you can see current occupancy and book a pod on the spot or online. Once you know the brand—such as Minute Suites, GoSleep, or Sleepbox—you’ll find their specific terminals and pricing, and you can reserve a spot in advance if you prefer.
Airport Terminal Maps
Where can you locate a sleep pod quickly when you’re navigating a busy terminal?
Use the airport’s interactive map on its website or portal; filter by “sleep pods” to see icons near gates, concourses, and mezzanine levels.
Check printed maps at information desks for backup.
Major hubs like ATL, DFW, PHL, LAX, and IAD mark pods, showers, Wi‑Fi, and work desks, helping you plan a free, comfortable layover.
Real‑Time Availability Apps
How can you know instantly whether a sleep pod is free before you reach the gate? Real‑time apps let you see live occupancy, push alerts, and Wi‑Fi status for each terminal. GoSleep, Sleepbox, and provider sites update availability by the minute, while aggregator portals map pods worldwide. Use these tools to check Helsinki, Atlanta, or DFW pods, and plan your rest without guessing.
Kiosk and Online Booking
When you arrive at an airport, locating a sleep pod and confirming its availability can be as simple as using a nearby kiosk or an online booking platform. Tap the kiosk outside pod zones, select duration, pay, and receive a passcode; or visit minutesuites.com, choose terminal, time slot, enter details, and get an email confirmation. Both methods secure pods instantly, especially during peak hours.
Book Your Pod Quickly: Apps, Websites, and On‑Site Options
A handful of apps, websites, and on‑site procedures let you secure an airport sleeping pod in minutes, so you won’t waste time hunting for a spot during a layover. Use Zzzleepandgo, SleepBox, or YotelAir apps for instant check‑in; browse GoSleep.fi, Airportsleeppods.com, or CheapOair MilesAway for online reservations; or walk up to Minute Suites, GoSleep, and Dubai’s Sleep ‘n Fly for on‑site access. Rates run $30‑$55 per hour, with discounts for longer stays. Stay alert to unlicensed taxi approaches and crowds when heading to or from airport terminals.
Pack Smart: Essentials for a Short Stay in an Airport Sleeping Pod
You’ll want a compact essentials checklist that fits in a small bag, so grab travel‑size toiletries, a toothbrush, and a few hygiene wipes that meet TSA rules.
Add tech‑ready accessories like a phone charger, a 10,000 mAh power bank, a universal adapter, and noise‑canceling headphones to stay connected and rested.
Finally, include comfort‑boosting items such as a neck pillow, eye mask, earplugs, and a light jacket or blanket for a restful short stay.
If you plan to carry any photography gear, pack instant film or a Polaroid camera in your carry‑on to protect it from extra X-ray exposure in checked baggage.
Compact Essentials Checklist
Ever wonder how to fit everything you need into a small carry‑on for a night in an airport sleeping pod?
Pack travel‑size toiletries, a toothbrush, toothpaste, deodorant, and fresh underwear.
Add an eye mask, earplugs, and a compact neck pillow.
Slip a light jacket, a scarf, and compression socks into your bag.
Include a refillable water bottle, healthy snacks, and a neck wallet for passport and cash.
Secure your luggage with a padlock and set multiple alarms.
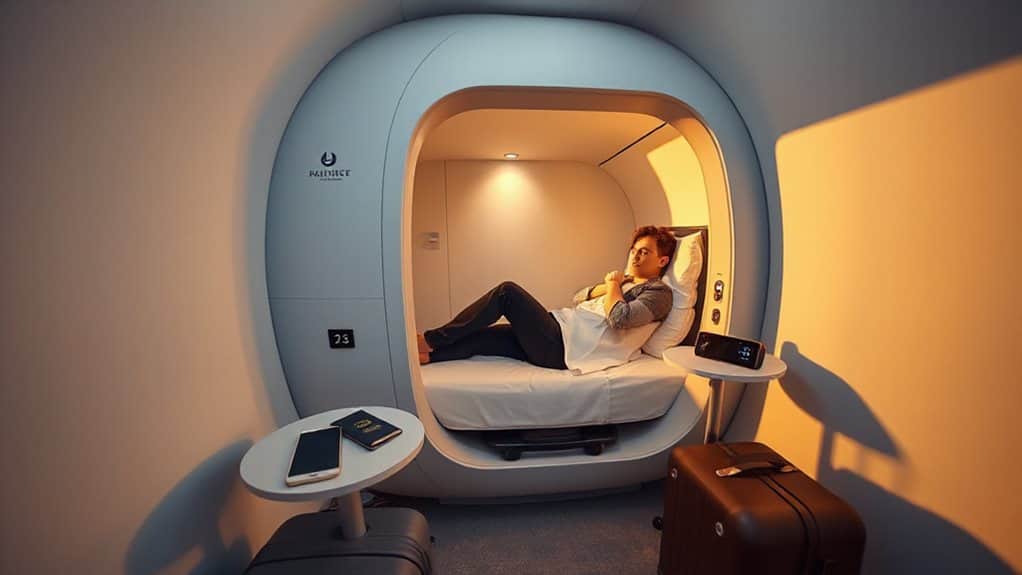
Tech‑Ready Accessories
How can you make the most of the tech‑ready accessories that turn a brief airport pod stay into a functional workspace or restful retreat? Plug into integrated USB outlets or 12V ports to keep phones, tablets, and laptops powered.
Use the pod’s Wi‑Fi and touchscreen controls for streaming, work, or climate adjustments.
Adjust mood lighting and ventilation for comfort, and secure the privacy cover for uninterrupted rest.
Comfort‑Boosting Items
Where can you fit the most comfort into a tiny airport pod? Pack breathable cotton or bamboo pajamas, a lightweight blanket, and a soft shawl for temperature control. Bring a travel pillow with neck alignment, an eye mask, and moldable ear plugs to block noise and light. Include a small hygiene kit—sanitizer, wipes, toothbrush, and pain reliever—to stay fresh and pain during your short stay.
Secure Your Belongings: Lockers, Alarm Clock, and Flight Display
When you step into a sleep pod, the enclosed design instantly gives you a locked, private space where you can keep your bags, devices, and precious belongings within arm’s reach.
You’ll find built‑in lockers or compartments, a power outlet for charging, and Wi‑Fi that lets you monitor flight status on your phone.
Use the pod’s alarm‑clock app to set wake‑up alerts, and keep an eye on gate information displayed nearby, ensuring you stay organized and ready to board.
The DMZ lies roughly 23 km from Seoul, so many travelers in the city can reach the Dora Observatory to view the border area.
Adjust Lighting, Temperature, and Sound in Your Airport Sleeping Pod

Ever wonder how you can tailor the pod’s environment to your comfort? Use the touchscreen to dim the ambient LED lights, switch on calming purple hues, or turn them off for darkness. Adjust temperature with the snowflake icon, set the AC or Dyson fan for cool air, and rely on the ventilation system for fresh circulation. Activate the Bluetooth speaker or rely on built‑in soundproofing to block airport noise. Remember that off-peak travel can make finding and booking pods easier and often cheaper.
Maximize In‑Pod Comfort: Wi‑Fi, Charging, and Entertainment
How can you make the most of a short layover in an airport sleeping pod? Connect to the free Wi‑Fi at Terminal 3, Level 2, or upgrade to premium for faster speeds. Plug your phone or laptop into built‑in USB ports to stay powered. Use the touch‑screen to stream movies, music, or enable white‑noise speakers. Control settings through the app for personalized comfort.
Speedy Check‑In & Check‑Out: Documents, Payments, and Timing
After setting up your pod’s Wi‑Fi and entertainment, you’ll need to focus on the check‑in and check‑out process to make the most of a short layover.
Bring a valid ID, passport for international terminals, and a paper boarding pass backup.
Reserve online, pay by credit card or digital method, and select a 3 pm slot.
Check out by noon via the pod screen, confirm digitally, and use your phone for re‑entry if needed.
And Finally
By following these steps, you’ll make the most of airport sleeping pods. Choose the right pod, check its location and availability, and book quickly through preferred apps or on‑site kiosks. Pack essential items, secure your belongings, and adjust lighting, temperature, and sound for comfort. Take advantage of Wi‑Fi, charging ports, and entertainment options, then streamline check‑in and check‑out with proper documents and payments. This systematic approach guarantees a restful, hassle‑free layover.